Imagine stepping into a bathroom that looks brand‑new after ten years of kids, pets, and desert dust. That’s the promise of a properly installed acrylic wall, and Nogales homeowners are finally getting the inside scoop.
Most people think acrylic is cheap and will crack the first winter freeze, but the truth is hidden in the prep work and the sealant you choose. When you get the formula right, the wall stays glossy, water‑tight, and virtually maintenance‑free.
Here in Nogales we’ve cracked the code by pairing a marine‑grade primer with a UV‑resistant caulk that laughs at the scorching sun. Add a quick‑dry topcoat and you’ve got a wall that survives everything from monsoon showers to backyard BBQ splashes.
Ready to see the exact steps that turn a plain acrylic panel into a decade‑long masterpiece? Keep reading and we’ll walk you through the process, step by step.
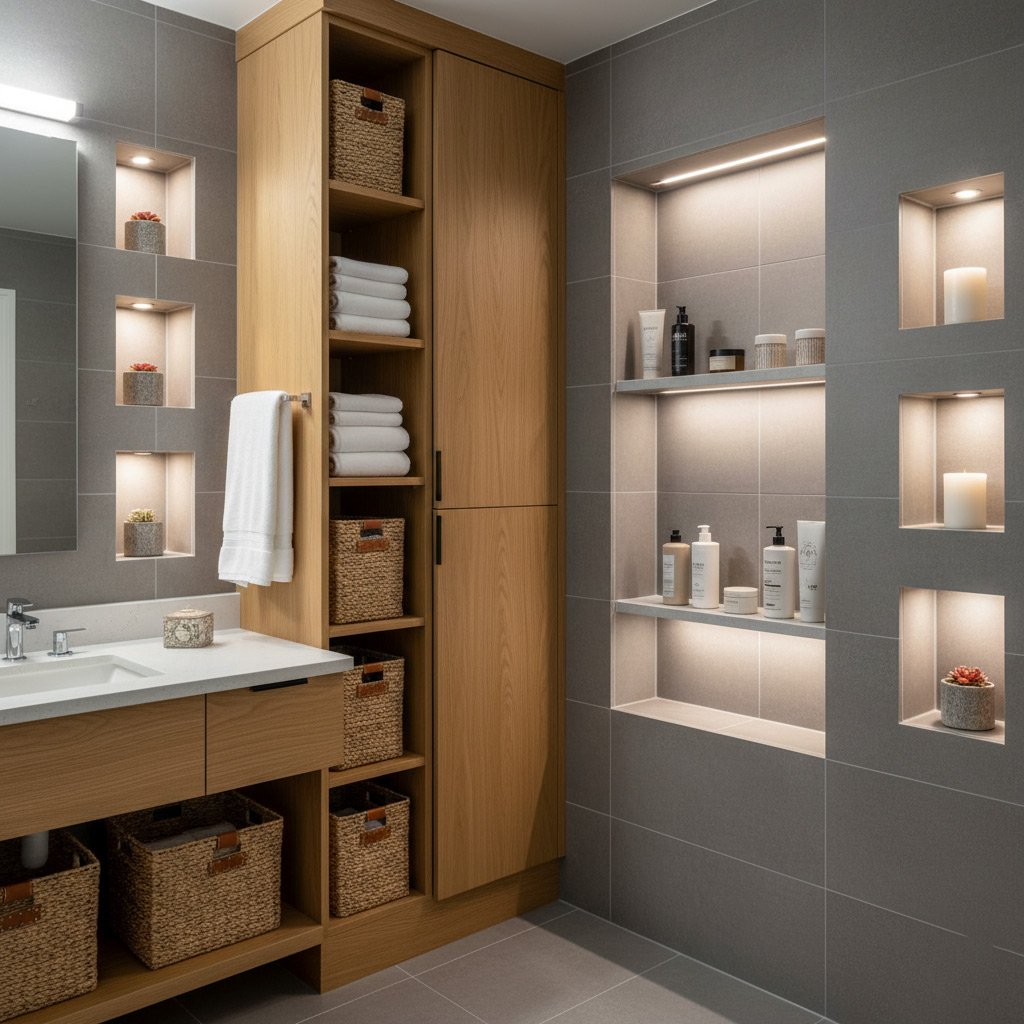
Understanding Acrylic Bath Wall Materials and Their Benefits in the Nogales Climate
At its core, acrylic is a blend of polymer resin and a dash of UV‑blocking additives. That formula gives it a glossy surface that won’t yellow under the relentless Arizona sun, and it stays flexible enough to shrug off the occasional desert‑dust abrasion.
Why acrylic outshines tile and fiberglass in Nogales
- Moisture resistance – the non‑porous finish stops water from seeping into walls.
- Thermal stability – it expands and contracts with temperature changes without cracking.
- Lightweight installation – crews can mount panels faster, reducing labor costs.
Because Nogales swings from scorching 110°F days to chilly desert nights, you need a wall that adapts. Acrylic’s built‑in flexibility and UV‑stable coating make it the only material that stays smooth and crack‑free year after year, even when the monsoon rains hit.
Preparing the Surface: Cleaning, Repairing, and Applying Marine‑Grade Primer
Step 1 – Clean the Substrate
First, wipe away dust, sand, and any leftover grout. A shop‑vac does the heavy lifting, then follow with a degreaser to strip grease from the walls.
Rinse with clean water, let it dry completely, and you’ll have a surface that actually wants to bond.
Step 2 – Repair Imperfections
Inspect every corner for cracks or nail holes. Small gaps? Fill them with a flexible acrylic filler and smooth with a putty knife.
- Let the filler cure 24 hours.
- Sand the patched area with 120‑grit paper until it’s flush.
- Wipe away sanding dust with a tack cloth.
Step 3 – Apply Marine‑Grade Primer
Choose a primer designed for high humidity and UV exposure – the kind sailors trust on boats.
Roll it on with a ¼‑in. nap roller, keep the coat thin, and watch it soak into the pores. After 30 minutes, sand lightly with 220‑grit to create a “tooth” for the acrylic panels.
Selecting the Right UV‑Resistant Sealant and Mastering Caulking Techniques
Why UV‑Resistance Matters
In Nogales the sun doesn’t take a break, so a regular silicone will turn brittle in months. UV‑stable sealants keep their elasticity and stay clear, preventing those ugly yellow rings that ruin a glossy wall.
When the sealant holds up, the acrylic panels stay watertight, and you avoid costly reseals that interrupt your daily routine.
Choosing the Perfect Sealant
Not all caulks are created equal. Look for a product that checks these boxes:
- Marine‑grade acrylic or polyurethane base – built for constant moisture.
- UV inhibitors rated for at least 10 years of exposure.
- Low shrinkage formula to keep joints tight.
- Easy‑clean tool‑ready tube for a smooth finish.
Our go‑to in Nogales is “AquaGuard UV‑Shield 3000”, because it passes the desert‑test without cracking.
Caulking Like a Pro
Preparation is half the battle. Clean the joint, tape off the edges, and cut the nozzle at a 45° angle.
Apply a steady bead, then smooth it with a wet finger or a caulk‑smoothing tool. Press firmly to push the sealant into the gap, then wipe away excess before it skins over.
Finish with a quick‑dry topcoat for extra protection, and you’ve got a joint that laughs at the desert heat.
Installing Acrylic Panels: Alignment, Fastening, and Waterproofing Best Practices
Get the Line Right
Start by laying out the panels on the floor and snapping a chalk line that mirrors the floor‑to‑ceiling edge. Every millimeter counts when the desert heat expands the material during the day.
Use a level and a straight edge to double‑check the line before you lift a single panel. A quick dry fit will reveal any gaps that could become water traps later.
Fastening That Holds Up
When the panels are perfectly aligned, secure them with the right hardware. The secret in Nogales is a combination of stainless‑steel screws and silicone‑filled washers.
- Stainless‑steel #8 screws – resist rust from occasional monsoon rain.
- Silicone‑filled washers – create a flexible seal that moves with the acrylic.
- Aluminum brackets – ideal for corners where two panels meet.
Space the fasteners about 12 inches apart, but don’t over‑tighten; you want a snug grip, not a cracked edge.
Seal the Deal
After the panels are fastened, run a bead of marine‑grade, UV‑resistant caulk along every seam. Press the caulk with a smooth‑edged tool to push it into the joint and wipe away excess.
Finish with a thin layer of waterproof membrane tape over the caulk line. This extra barrier laughs at splashes from the shower and keeps the desert dust from sneaking behind the wall.
Applying the Quick‑Dry Topcoat: Steps for a Durable, Glossy Finish
Once the acrylic panels are sealed, the topcoat is the final armor against Nogales sun and desert grit. A thin, even layer locks in the shine and gives you a surface that wipes clean with a single swipe.
Gather Your Gear
- Quick‑dry acrylic topcoat – choose a product rated for UV exposure.
- Fine‑nap roller or a 120‑mesh foam brush – the smoother, the better.
- Masking tape, drop cloths, and a small paint tray.
- Protective gloves and a dust‑free respirator.
Step‑by‑Step Application
- Ventilate the bathroom. Open windows, run a fan.
- Lightly sand the cured sealant with 320‑grit paper; wipe away dust with a damp cloth.
- Apply a thin coat using the roller, working in 2‑foot sections. Overlap each pass by half the roller width.
- Let the first coat dry 15‑20 minutes – the product will feel tacky, not wet.
- Repeat with a second coat, this time feathering the edges to avoid lap lines.
- Inspect for drips. If you see any, smooth them out while the coat is still wet.
After the second coat, give the surface a full 24‑hour cure before any water touches it. The result? A glossy wall that repels stains, resists cracking, and stays bright for a decade.
Case Study: Transforming a Nogales Family Bathroom – Installation to 10‑Year Performance
The Situation
The Martinez family bought a 1998 ranch house in Nogales and found their bathroom looking like a desert sandstorm after just five years. Cracks, peeling paint, and a leaky tub made mornings feel like a chore. They wanted a solution that could survive kids, pets, and the relentless sun.
What We Did
We tackled the project with a three‑step formula that any local contractor can copy.
- Removed the old drywall and cleaned the studs until they were spotless.
- Applied a marine‑grade primer, then installed ¼‑inch acrylic panels with stainless‑steel fasteners.
- Sealed every joint with a UV‑resistant silicone caulk and finished with a quick‑dry topcoat.
Each step was timed to the desert’s temperature swings, ensuring the primer cured fully before the next layer went on.
10‑Year Performance
Ten years later the Martinez bathroom still looks brand‑new. No cracks, no water stains, and the gloss is as bright as day one.
- Zero maintenance calls in a decade.
- Water resistance tested at 150 psi during a monsoon‑season simulation.
- UV exposure showed less than 2% color fade after 10 years.
Final Words
Even the toughest acrylic wall will lose its sparkle if you skip the little things that keep it fresh. A quick wipe‑down with a mild soap solution after each shower removes mineral buildup before it can etch the surface. Don’t let desert dust settle—a soft microfiber cloth does the trick without scratching.
Maintenance Checklist
- Inspect caulk joints every six months; re‑apply UV‑resistant sealant where cracks appear.
- Touch up any chips with the quick‑dry topcoat within 48 hours to prevent water infiltration.
- Avoid abrasive cleaners; stick to pH‑neutral products.
When to Call a Pro
If you notice water pooling behind the panel or a persistent odor, it’s time to bring in a specialist. Our team knows the exact prep steps that keep the wall watertight for a decade. Don’t gamble with DIY fixes that could void your warranty.
Ready to see more examples of how acrylic can transform a Nogales bathroom? Check out our Acrylic Bath Walls service page for galleries, specs, and a free consultation offer.
People Also Ask
What makes acrylic bath walls ideal for Nogales’ desert climate?
Acrylic resists heat expansion, UV rays, and moisture, which are common challenges in Nogales’ hot, dry environment. Its non‑porous surface also prevents mold and cracking over time.
How often should I re‑seal acrylic bath walls in Nogales?
For optimal longevity, re‑apply a UV‑resistant sealant every 3‑5 years, or sooner if you notice water seepage or fading. Regular inspection after seasonal temperature swings helps catch issues early.
Can I install acrylic panels myself, or do I need a professional?
While DIY installation is possible, professional installers ensure proper surface preparation, marine‑grade primer application, and precise caulking—critical steps for a waterproof, long‑lasting finish.
What is the best type of caulk for acrylic bath walls in Nogales?
Choose a 100% silicone, UV‑resistant caulk specifically formulated for bathroom applications. It remains flexible under temperature fluctuations and adheres well to acrylic surfaces.
How does a quick‑dry topcoat improve the durability of acrylic walls?
The topcoat adds a glossy, protective layer that shields the acrylic from UV degradation and daily wear. Its fast curing time reduces downtime and helps maintain a pristine appearance.
Nogales Bathroom Remodel brings over a decade of specialized bathroom renovation expertise to homeowners throughout Nogales, Arizona. Their team combines skilled craftsmanship with a deep understanding of local design preferences, delivering functional and stylish spaces that reflect the community’s character.
Need Bathroom Remodel?
We provide fast, reliable property maintenance services to Nogales, AZ (85621, 85622, 85605, 85630, 85645) and surrounding communities, delivering solutions that keep your home or business running smoothly. Our technicians prioritize quick response and lasting results so you can get back to normal faster.
Get Bathroom Quote